The analysis of the machining accuracy of the shaft gear hobbing
| Through the analysis of the machining accuracy of the shaft gear hobbing, the factors affecting the machining accuracy of the hobbing are found out, so as to improve the quality of the hobbing processing. |
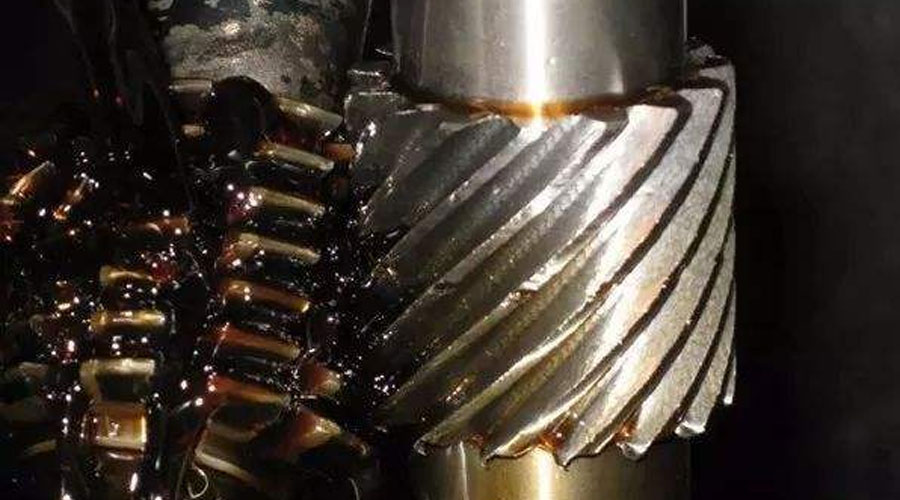
The shaft gear is the most important part in the gearbox, and its machining accuracy directly affects the overall quality of the gearbox. At present, the machining method of the gear teeth used by us is the hobbing and shaving method. To produce high-precision gears by rolling and shaving, it is necessary to maximize the level of rolling and shaving. The shaving accuracy is largely dependent on the accuracy of the saddle hobbing, so some error items in the hobbing must be strictly controlled to produce high quality gears. Hobbing is a commonly used gear processing method.
On a high-precision hobbing machine, a precision hob can be used to machine gear teeth with 4-5 precision. On the ordinary hobbing machine, only 8 precision gear teeth can be machined with the normal precision hob. The accuracy of the gear shaft gear tooth is 8-7-7, and the hobbing process is mainly based on the two center holes and the end face. Therefore, the error source of the hobbing is analyzed, and the method of ensuring and improving the machining accuracy is mastered. Very important.
The accuracy of the shaft teeth is mainly related to the motion accuracy, the stationarity accuracy, and the contact accuracy. Control the length of the common normal line and the ring gear diameter in the hobbing process
To ensure the motion accuracy, the control tooth profile error and the base segment deviation are used to ensure the smoothness of the work, and the tooth pitch error is controlled to ensure the contact accuracy. The following is an analysis of several error causes that are prone to hobbing:
1. Ring gear radial runout error (ie geometric eccentricity)
The ring gear radial runout refers to the maximum variation of the probe relative to the tooth axis in the range of the gear, the probe is in the tooth groove or on the gear teeth, and is in contact with the middle of the tooth height. It is also the eccentricity of the gear ring relative to the centerline of the shaft. This eccentricity is caused by the fact that the two central holes of the part do not coincide or deviate too much from the center of rotation of the table when the parts are mounted. Or due to poor manufacturing of the top and top holes, the contact surface is not well contacted, resulting in eccentricity, so the ring diameter jump should be mainly solved from the above reasons.
2. Common normal length error (ie motion eccentricity)
Hobbing is to use the principle of the forming method to machine the gear. The gear transmission chain from the tool to the tooth blank should maintain the accuracy of the movement according to a certain transmission ratio. But these drive chains are made up of a series of transmission components.
Their manufacturing and assembly errors must be concentrated on the end parts of the transmission chain during the transmission movement, resulting in non-uniformity of relative motion and affecting the machining accuracy of the gear teeth. The change of the length of the common normal line is the maximum error that reflects the uneven distribution of the gear teeth.
This error is mainly caused by the uneven rotation accuracy of the worm gear table of the hobbing machine, as well as the circular guide rail wear of the hobbing machine table, the indexing worm wheel and the circular guide of the table. Caused by different axes, in addition, there are serious bumps on the tooth surface of the split gear and the loose or too tight bite of the hanging wheel will also affect the variation of the common normal.
3. Tooth shape error analysis
Tooth shape error refers to the normal distance between two ideal toothed (involute) profiles that accommodate the actual tooth profile in the toothed working portion.
It is impossible to obtain a completely correct involute profile in the actual machining process, and there are always various errors, thereby affecting the smoothness of the transmission. The base circle of the gear is the only parameter that determines the shape of the involute tooth. If the base circle produces an error during the hobbing process, the tooth situation must also have errors. Base circle radius R= Hob moving speed / table slewing angular speed xcosao (ao is the original tooth angle of the hob).
During the hobbing process, the involute tooth shape is mainly ensured by maintaining a certain speed ratio between the hob and the blank. It can be seen that the tooth profile error is mainly determined by the hob tooth shape error, and the hob edge grinding quality is not good and the tooth profile error is easy to occur. At the same time, the radial runout and axial turbulence (ie installation error) generated by the hob during installation also have an influence on the tooth profile error. Common tooth shape errors are asymmetrical, tooth angle error (tooth top or thick), cycle error, and so on.
4. Tooth direction error analysis
The tooth tooth error is the end face distance of the two design tooth lines that accommodate the actual tooth line in the range of the full tooth width on the indexing cylindrical surface. The main cause of the tooth misalignment is that the vertical feed direction of the machine tool and the tool holder is offset from the axis of the part, or the center of the top end of the tailstock is inconsistent with the center of rotation of the table, and the calculation error of the differential hanging wheel when rolling the helical gear Large, differential drive chain gear manufacturing and adjustment errors are too large. In addition, the accuracy of the manufacturing, installation and adjustment of the jig and the blank can also cause the toothing error.
5. Tooth surface roughness analysis
There are several phenomena in the tooth surface roughness: hairline, caries, fish phosphorus, tear.
The main causes of the difference in tooth surface roughness are as follows: the overall rigidity of the machine tool, the tool and the workpiece system is insufficient, the gap is large; the relative position of the hob and the workpiece changes; the hob is not sharply ground, the material of the part is not uniform; the cutting parameters are not selected. Suitable
Link to this article: Method for improving machining precision of shaft gear hobbing
Reprint Statement: If there are no special instructions, all articles on this site are original. Please indicate the source for reprinting:https://www.cncmachiningptj.com/,thanks!
 PTJ® provides a full range of Custom Precision cnc machining china services.ISO 9001:2015 &AS-9100 certified. 3, 4 and 5-axis rapid precision CNC machining services including milling, turning to customer specifications,Capable of metal & plastic machined parts with +/-0.005 mm tolerance.Secondary services include CNC and conventional grinding, drilling,die casting,sheet metal and stamping.Providing prototypes, full production runs, technical support and full inspection.Serves the automotive, aerospace, mold&fixture,led lighting,medical,bicycle, and consumer electronics industries. On-time delivery.Tell us a little about your project’s budget and expected delivery time. We will strategize with you to provide the most cost-effective services to help you reach your target,Welcome to Contact us ( [email protected] ) directly for your new project.
Link to this article:Method for improving machining precision of shaft gear hobbing
Reprint Statement: If there are no special instructions, all articles on this site are original. Please indicate the source for reprinting:Alloy Wiki,thanks!^^


